
 Vue3.2项目架构
# 前言
随着vue3.2版本的更新,最新vue全家桶技术栈也发生了部分改变
老版本全家桶:
vue2.6+vue-router+vuex+vue-cli+axios新版本全家桶:
vue3.2+vue-router@4.x+pinia+vite2+TypeScript+axios
接下来我们开始一起搭建一个移动端vue3.2的项目吧~
# 1.快速创建项目
yarn create vite my-vue-app --template vue-ts #快速初始化项目
yarn   #安装项目所有三方包
yarn dev  #运行项目
2
# 2.vite 配置
vite.config.js 配置
安装 path 模块 配置@快捷路径
yarn add @types/node -D
import { defineConfig } from 'vite'
import vue from '@vitejs/plugin-vue'
import { resolve } from 'path'

// https://vitejs.dev/config/
export default defineConfig({
  plugins: [vue()],
  resolve: {
    alias: {
      '@': resolve(__dirname, 'src') // 设置 `@` 指向 `src` 目录
    }
  },
  base: './', // 设置打包路径
})
2
3
4
5
6
7
8
9
10
11
12
13
14
# 3.vue-router 路由配置
安装 vue-router@4 版本
yarn add vue-router@4
创建 src/router/index.ts 路由配置文件
import { createRouter, createWebHistory, RouteRecordRaw } from 'vue-router'
const routes: Array<RouteRecordRaw> = [
    {
        path: '/',
        redirect: '/home'
    },
    {
        path: '/home',
        name:'home',
        component: () => import('@/views/home/Home.vue')
    },
    {
        path: '/about',
        name:'about',
        component: () => import('@/views/about/About.vue')
    }
]
const router = createRouter({
    history: createWebHistory(),
    routes
})
export default router
2
3
4
5
6
7
8
9
10
11
12
13
14
15
16
17
18
19
20
21
22
将路由配置文件 注册到顶级对象中 main.ts
import { createApp } from 'vue'
import App from './App.vue'
import router from './router/index'

const app = createApp(App);
//挂载路由:一定要先创建app 然后注册路由,最后才是挂载 app的dom节点【必须有先后顺序】
app.use(router);

app.mount('#app')
2
3
4
5
6
7
8
9
10
# 4.pinia 替代vuex
官网地址: https://pinia.vuejs.org/
pinia 是新一代状态管理仓库,是和vue3 连用的新型状态管理仓库。
尤雨溪: pinia相当于就是vuex5 ,未来vuex不会再进行更新和升级。
pinia 有非常强的类型推断特点,不必再为了类型的定义烦恼
vuex:五大核心配置: state getters mutations(同步修改数据) actions(异步修改数据) modules
pinia:四大核心配置:state getters actions【修改数据的方法】 modules
# 4.1 安装 pinia
yarn add pinia
# 4.2 创建文件 src/store/index.ts
import { defineStore } from 'pinia'

//defineStore 函数
//参数1:模块名 保证整个状态管理中的唯一
//参数2:对象 包含核心配置
export const testStore = defineStore('test', {
  state: () => {
    return {
        num:100,
    }
  },
  getters: {
    getNewNum(): string {
        return '最新的数字是:'+this.num;
    }
  },
  actions: {
    setNewNum(num:number) {
        this.num = num;
    }
  }
})
2
3
4
5
6
7
8
9
10
11
12
13
14
15
16
17
18
19
20
21
22
# 4.3 main.ts 挂载
import { createApp } from 'vue'
const app = createApp(App)
//导入pinia 状态管理
import {createPinia} from 'pinia'
const store = createPinia();

//注册pinia
app.use(store)
2
3
4
5
6
7
8
# 4.4 使用数据
使用数据2种方法
// 导入定义好的 状态管理类
import { testStore } from '../../store';
//通过testStore 创建一个一个实例
const test = testStore()

//使用方式1: 需要使用时获取
console.log(test.num);
//使用方式2: 加入computed 每次改变自动拿到最新数据
//computed 获取最新数据
const num = computed(()=>{
    return test.num;
})
2
3
4
5
6
7
8
9
10
11
12
# 4.5 修改状态管理中的数据
修改数据的2种方法
import { testStore } from '../../store';
//通过testStore 创建一个一个实例
const test = testStore()

//方式1:修改状态管理库中的数据
const addNum=()=>{
    //直接修改数据
    test.$patch({num:test.num+1})
}
//方式2:借助actions方法 覆盖数据
const setNum=()=>{
    test.setNewNum(2000);
}
2
3
4
5
6
7
8
9
10
11
12
13
# 4.6 getters 装饰器使用
import { testStore } from '../../store';
//通过testStore 创建一个一个实例
const test = testStore()

let getterNum = test.getNewNum;
console.log(getterNum);   //最新的数字是:100
2
3
4
5
6
# 5. 使用vant@4
官网地址:https://vant-contrib.gitee.io/vant/v4/#/zh-CN/home
- 安装 最新版 vant ui(vue3版本)
npm i vant
或
yarn add vant
2
3
# 5.1 导入所有组件 【不推荐】
不推荐原因:vant 封装了太多业务组件,如果一次性导入所有的组件,项目打包时会打包非常多用不到的组件,浪费性能。
- main.ts
import { createApp } from 'vue'
const app = createApp(App)

//导入vant ui
import Vant from 'vant';
import 'vant/lib/index.css';
app.use(Vant);
2
3
4
5
6
7
8
# 5.2 按需导入【推荐】
- main.ts
//按需导入vant ui
import 'vant/lib/index.css';
import { Button,Field } from 'vant';
//注册组件
app.use(Button).use(Field);
2
3
4
5
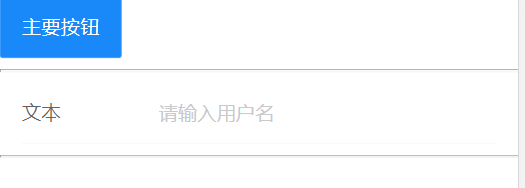
- 组件使用
<template>
    <div>
        <van-button type="primary">主要按钮</van-button>
        <hr>
        <van-field v-model="name" label="文本" placeholder="请输入用户名" />
        <hr>
    </div>
</template>
<script setup lang="ts">
import { ref } from 'vue'
let name = ref('');

</script>
2
3
4
5
6
7
8
9
10
11
12
13
# 6.使用 ant design vue @3
官网地址:https://www.antdv.com/components/overview
UI框架一般只选择一个,真实项目中 vant 和 antd 选择一个即可
- 安装
 npm i --save ant-design-vue
或
yarn add ant-design-vue
2
3
# 6.1 全局导入所有组件
另外两种注册方案: 按需全局注册(和vant按需引入方法一致) 和 组件局部注册使用 方案,请移步官方文档。
import { createApp } from 'vue'
const app = createApp(App)

//全局导入 antd
import Antd from 'ant-design-vue';
import 'ant-design-vue/dist/antd.css';
app.use(Antd)
2
3
4
5
6
7
- 组件使用
<template>
    <div>
        <a-button type="primary">Primary Button</a-button>
        <a-input v-model:value="name" placeholder="用户名" />
    </div>
</template>

<script setup lang="ts">
import { ref } from 'vue'
let name = ref('');
</script>
2
3
4
5
6
7
8
9
10
11
# 7.使用 element plus
最新版element导入使用: https://element-plus.gitee.io/zh-CN/
UI框架一般只选择一个,真实项目中 vant antd 和 element 选择一个即可
注意:vue3的管理系统中 element plus 有很多细节的bug,使用时一定要注意!!!
- 安装
npm install element-plus --save
或
yarn add element-plus
2
3
# 7.1 全局注册所有组件
import { createApp } from 'vue'
const app = createApp(App)

//全局导入 element
import ElementPlus from 'element-plus'
import 'element-plus/dist/index.css'
app.use(ElementPlus)
2
3
4
5
6
7
- 组件使用
<template>
    <div>
         <el-button type="primary">Primary</el-button>
          <el-input v-model="name" placeholder="Please input" />
    </div>
</template>

<script setup lang="ts">
import { ref } from 'vue'
let name = ref('');
</script>
2
3
4
5
6
7
8
9
10
11
# 8.axios 三层封装
两个接口均为测试mock数据接口
- 安装
yarn add axios
或
npm i axios
2
3
# 8.1全局配置层
主要完成 全局默认配置 ,拦截器配置等
创建: src/utils/request.ts
import axios from 'axios';

//服务器地址
axios.defaults.baseURL = 'https://api.example.com';

// 添加请求拦截器
axios.interceptors.request.use(function (config) {
    // 在发送请求之前做些什么
    return config;
  }, function (error) {
    // 对请求错误做些什么
    return Promise.reject(error);
  });

// 添加响应拦截器
axios.interceptors.response.use(function (response) {
    // 对响应数据做点什么
    return response;
  }, function (error) {
    // 对响应错误做点什么
    return Promise.reject(error);
  });
2
3
4
5
6
7
8
9
10
11
12
13
14
15
16
17
18
19
20
21
22
# 8.2 接口对应层
完成与后端接口一一对应的函数封装
创建 src/api/test.ts
import request from '../utils/request';

//get请求
export const wishList =(params:any)=>{
    return  request({
        url:'/wish/list',
        method:'get',
        params
    })
}

//post请求
export const cookerList =(data:any)=>{
    return  request({
        url:'/users/cookerList',
        method:'post',
        data
    })
}
2
3
4
5
6
7
8
9
10
11
12
13
14
15
16
17
18
19
# 8.3 接口调用层
调用时 异步转同步 直接获取返回数据 async await
<template>
    <div>
    </div>
</template>

<script setup lang="ts">
import { onMounted } from 'vue';
import {wishList,cookerList} from '../../api/test'

//接口1
const getWishList = async ()=>{
    let res = await wishList({});
    console.log(res);
}

//接口2
const getCookerList = async ()=>{
    let res = await cookerList({});
    console.log(res);
}

// 进入页面调用发送请求
onMounted(()=>{
    getWishList();
    getCookerList();
})

</script>
2
3
4
5
6
7
8
9
10
11
12
13
14
15
16
17
18
19
20
21
22
23
24
25
26
27
28
29